
Note: This page builds on the article that explains how to approve payments [here].
1.
Go to “Dashboard” in the menu on the left.
Here, the payments look the same as in the linked article – but notice that under “Approvals” the status shows 0/2 in this example. This means the payment requires two approvals before it can be sent to the bank.

2.
Click on the payment to open the dialog shown below.
Verify that the payment details are correct and click “Approve” to approve.
You will then be prompted to authenticate with your authentication app. If you have not yet set this up, you can find the instructions [here].
3.
Return to the “Dashboard” in the menu on the left.
You will now see that the payment is still listed under “Approval.” Notice that under “Approvals” the status has changed from 0/2 to 1/2 – meaning one approval is still missing.
The remaining approval must be performed by another user who is added under the company in the Pay dashboard. That user must log in and complete the same process as the first approver.
4.
The second approver repeats the same process for the same payment.
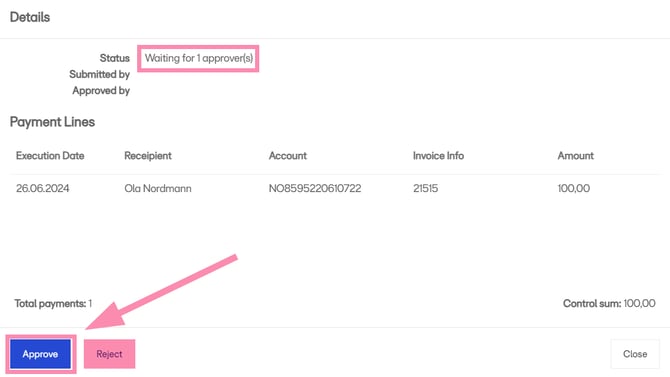
Before approving, the last approver will see that the payment is waiting for one approval – see “Status” in the example below.
Click “Approve” to complete the final approval and go through the authentication process.
5.
When you return to the “Dashboard,” the payment will no longer be shown under “Approval” because it has now been sent to the bank.
In the field where the example shows “Sent to bank,” the label will display “Approval.”
Select “Sent to bank” to view payments that have been sent to the bank.
The payment is now approved.